


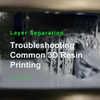

Abstract: Light-curing 3D printing is an advanced manufacturing technology that uses resin materials to produce a wide range of complex models and parts quickly and accurately. This article explains how light-curing 3D printing technology works, the materials it uses and the advantages it offers for model design, and brings you a tutorial on using the Uniformation 3d range of products, including setup, operation and maintenance.
From digital models to real objects
Light-curing 3D printing is a technology that rapidly cures liquid resin into a solid state by means of UV light. The light source is irradiated from the bottom of the machine through the screen from bottom to top in a certain shape immersed in the building platform of the resin vat, followed by a sliding filament bar to do a layer by layer lifting, and then by repeating the process over and over again, you end up with a complete ,three-dimensional model being created layer by layer.

The models made by light-curing 3D printers are so fine that they can easily print organic curves, sharp angles, and even the texture of feathers and scales. Moreover, light-curing 3D resin printing technology can also print models with different colours and materials, enabling designers to better showcase their creativity.
Pioneering the Era of Intelligent Automatic Preheating Technology
To solve the problem of resin curing in low-temperature seasons and regions, Uniformation 3d launched the desktop-grade automatic warm-up printer, GKtwo, in 2022. GKtwo adopts LCD printing technology with 8K ultra-high-definition resolution and 10.3-inch printable area, which is perfectly suited to the needs of art, handmade models and jewellery, and small batch producers. the GKtwo also comes with a 5’’ HD touch screen and leak-proof build plate design for easier and cleaner operation.

Start embarking on an amazing printing journey
The following steps are required to create a model with the Uniformation 3d printer:
1、Machine assembly: install the activated carbon filter and connect the power cable.
2、Testing UV: Perform a screen verification test to ensure that the correct image is displayed.
3、Leveling test: Select ‘Z-axis’ and click the ‘Z0’ icon. Press a piece of flat paper against the build plate to
ensure that the tension is appropriate in all four corners.
4、Preparation for printing: Check whether the build plate and resin bucket are clean and dry, and make sure the printer setup is complete.
5、First Printing: Check if the NFEP is intact,pour in no more than 700g of resin according to the maximum fill line.
6、Print the model: Close the lid, insert the USB stick, select print and start.
7、Dispose of the model and residue: wait for the resin to stop dripping, carefully remove the model and the build plate.

During the printing process, you can also observe the birth of a beautiful model. After completing the print, remove the model from the platform and clean off the excess resin. Finally, the model is placed under a UV light for curing to ensure strength and stability.
The printing software allows users to adjust parameters such as model size, print speed, and resolution after loading the model file. In addition, the Uniformation 3d user manual provides more detailed operating instructions to help users better utilize and operate with desktop-grade light-curing 3D printers.

